Entries in Before & Afters (6)

Sunday
Nov042012

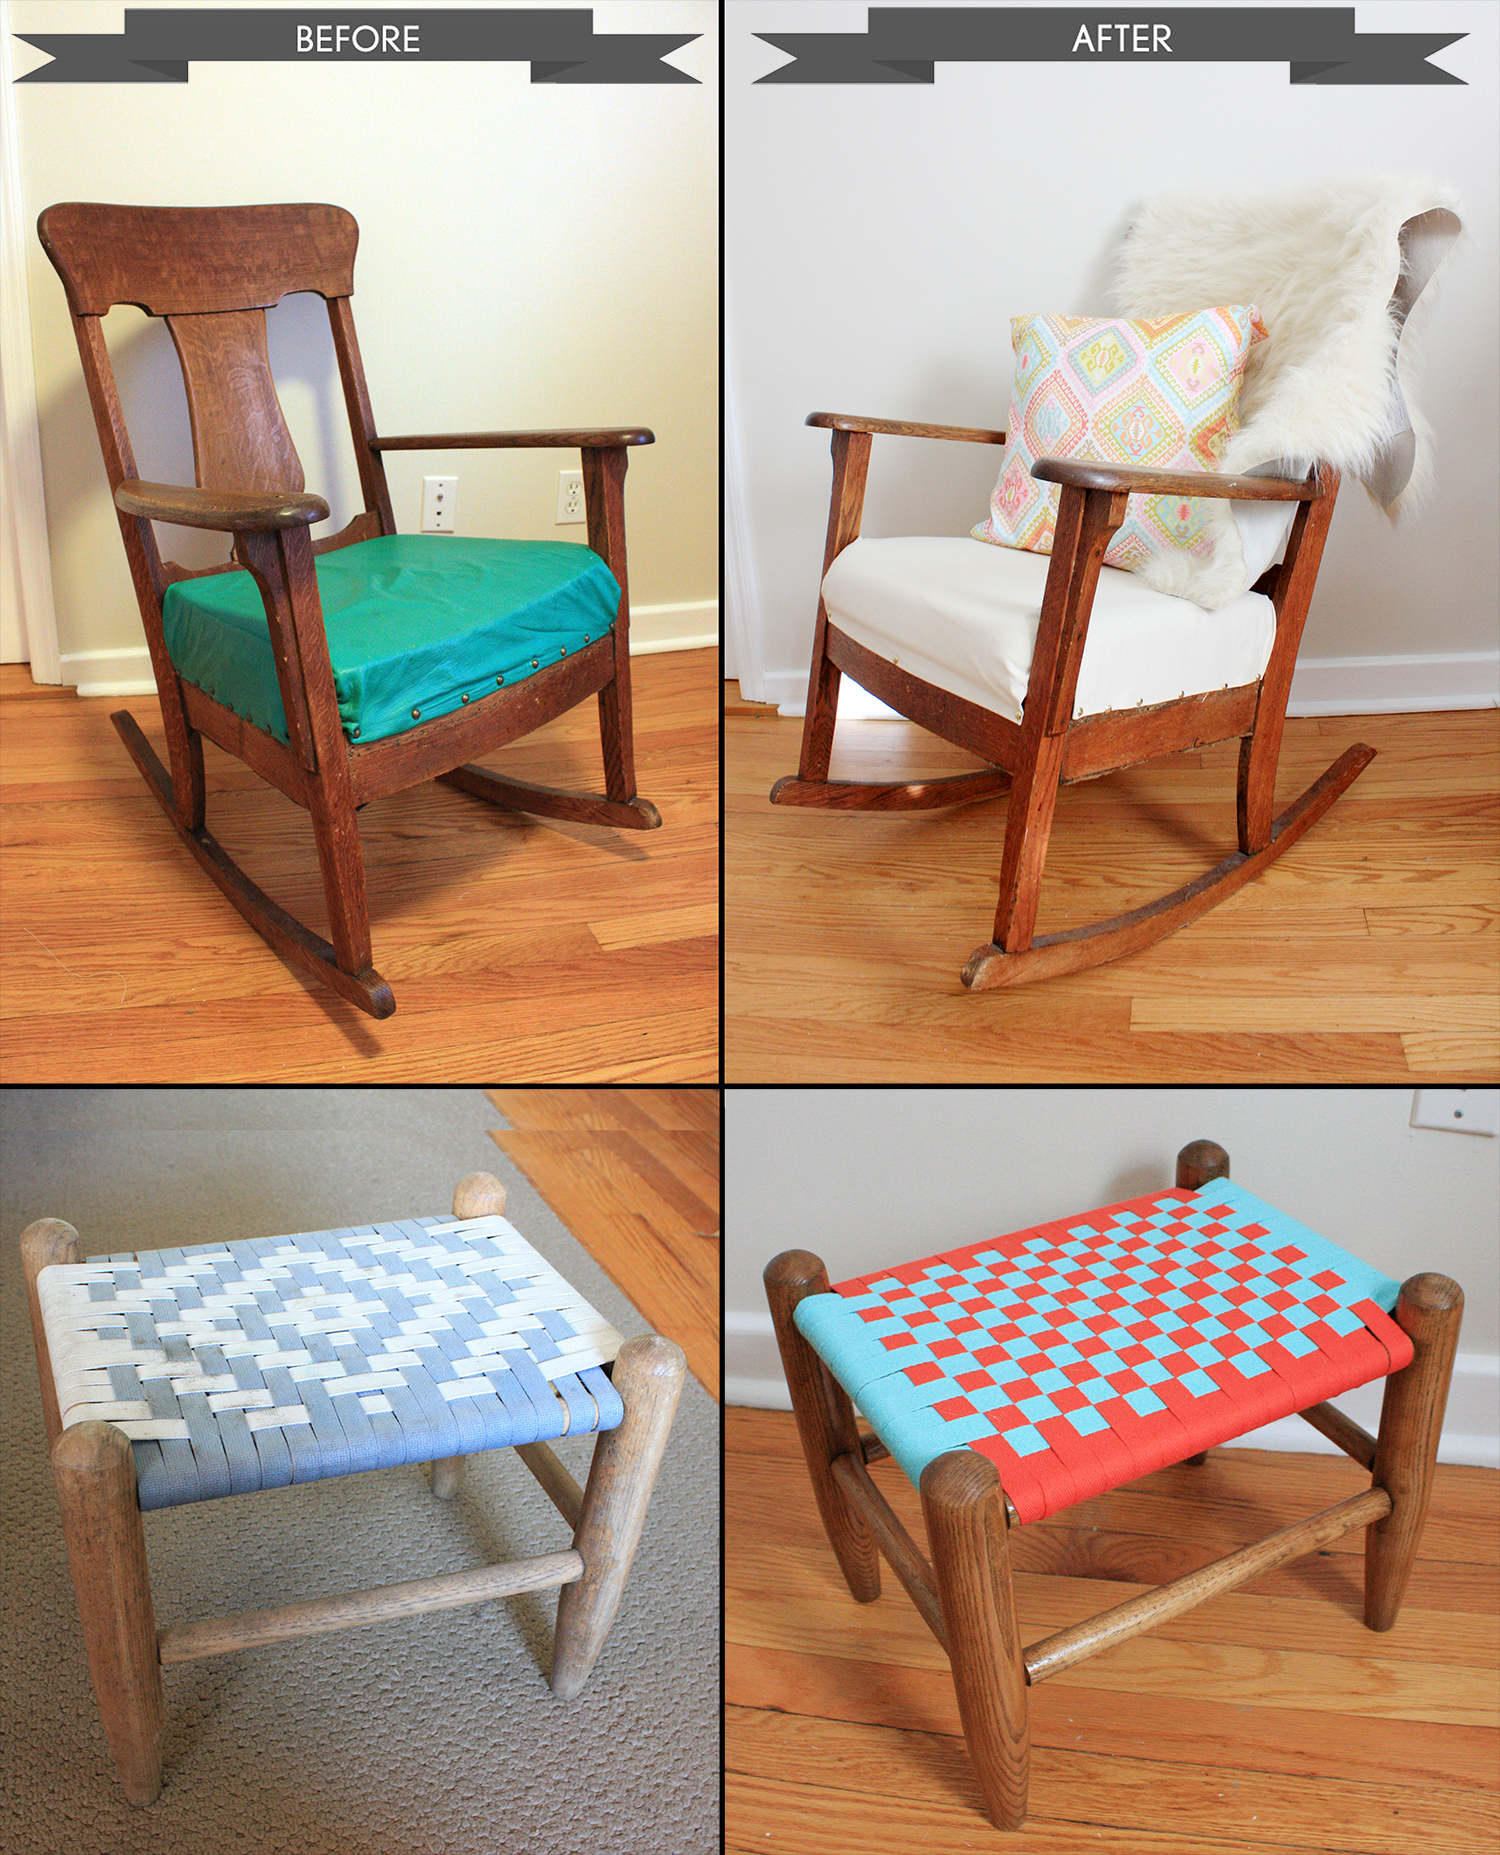
Before & After: Rocking Chair with Stool

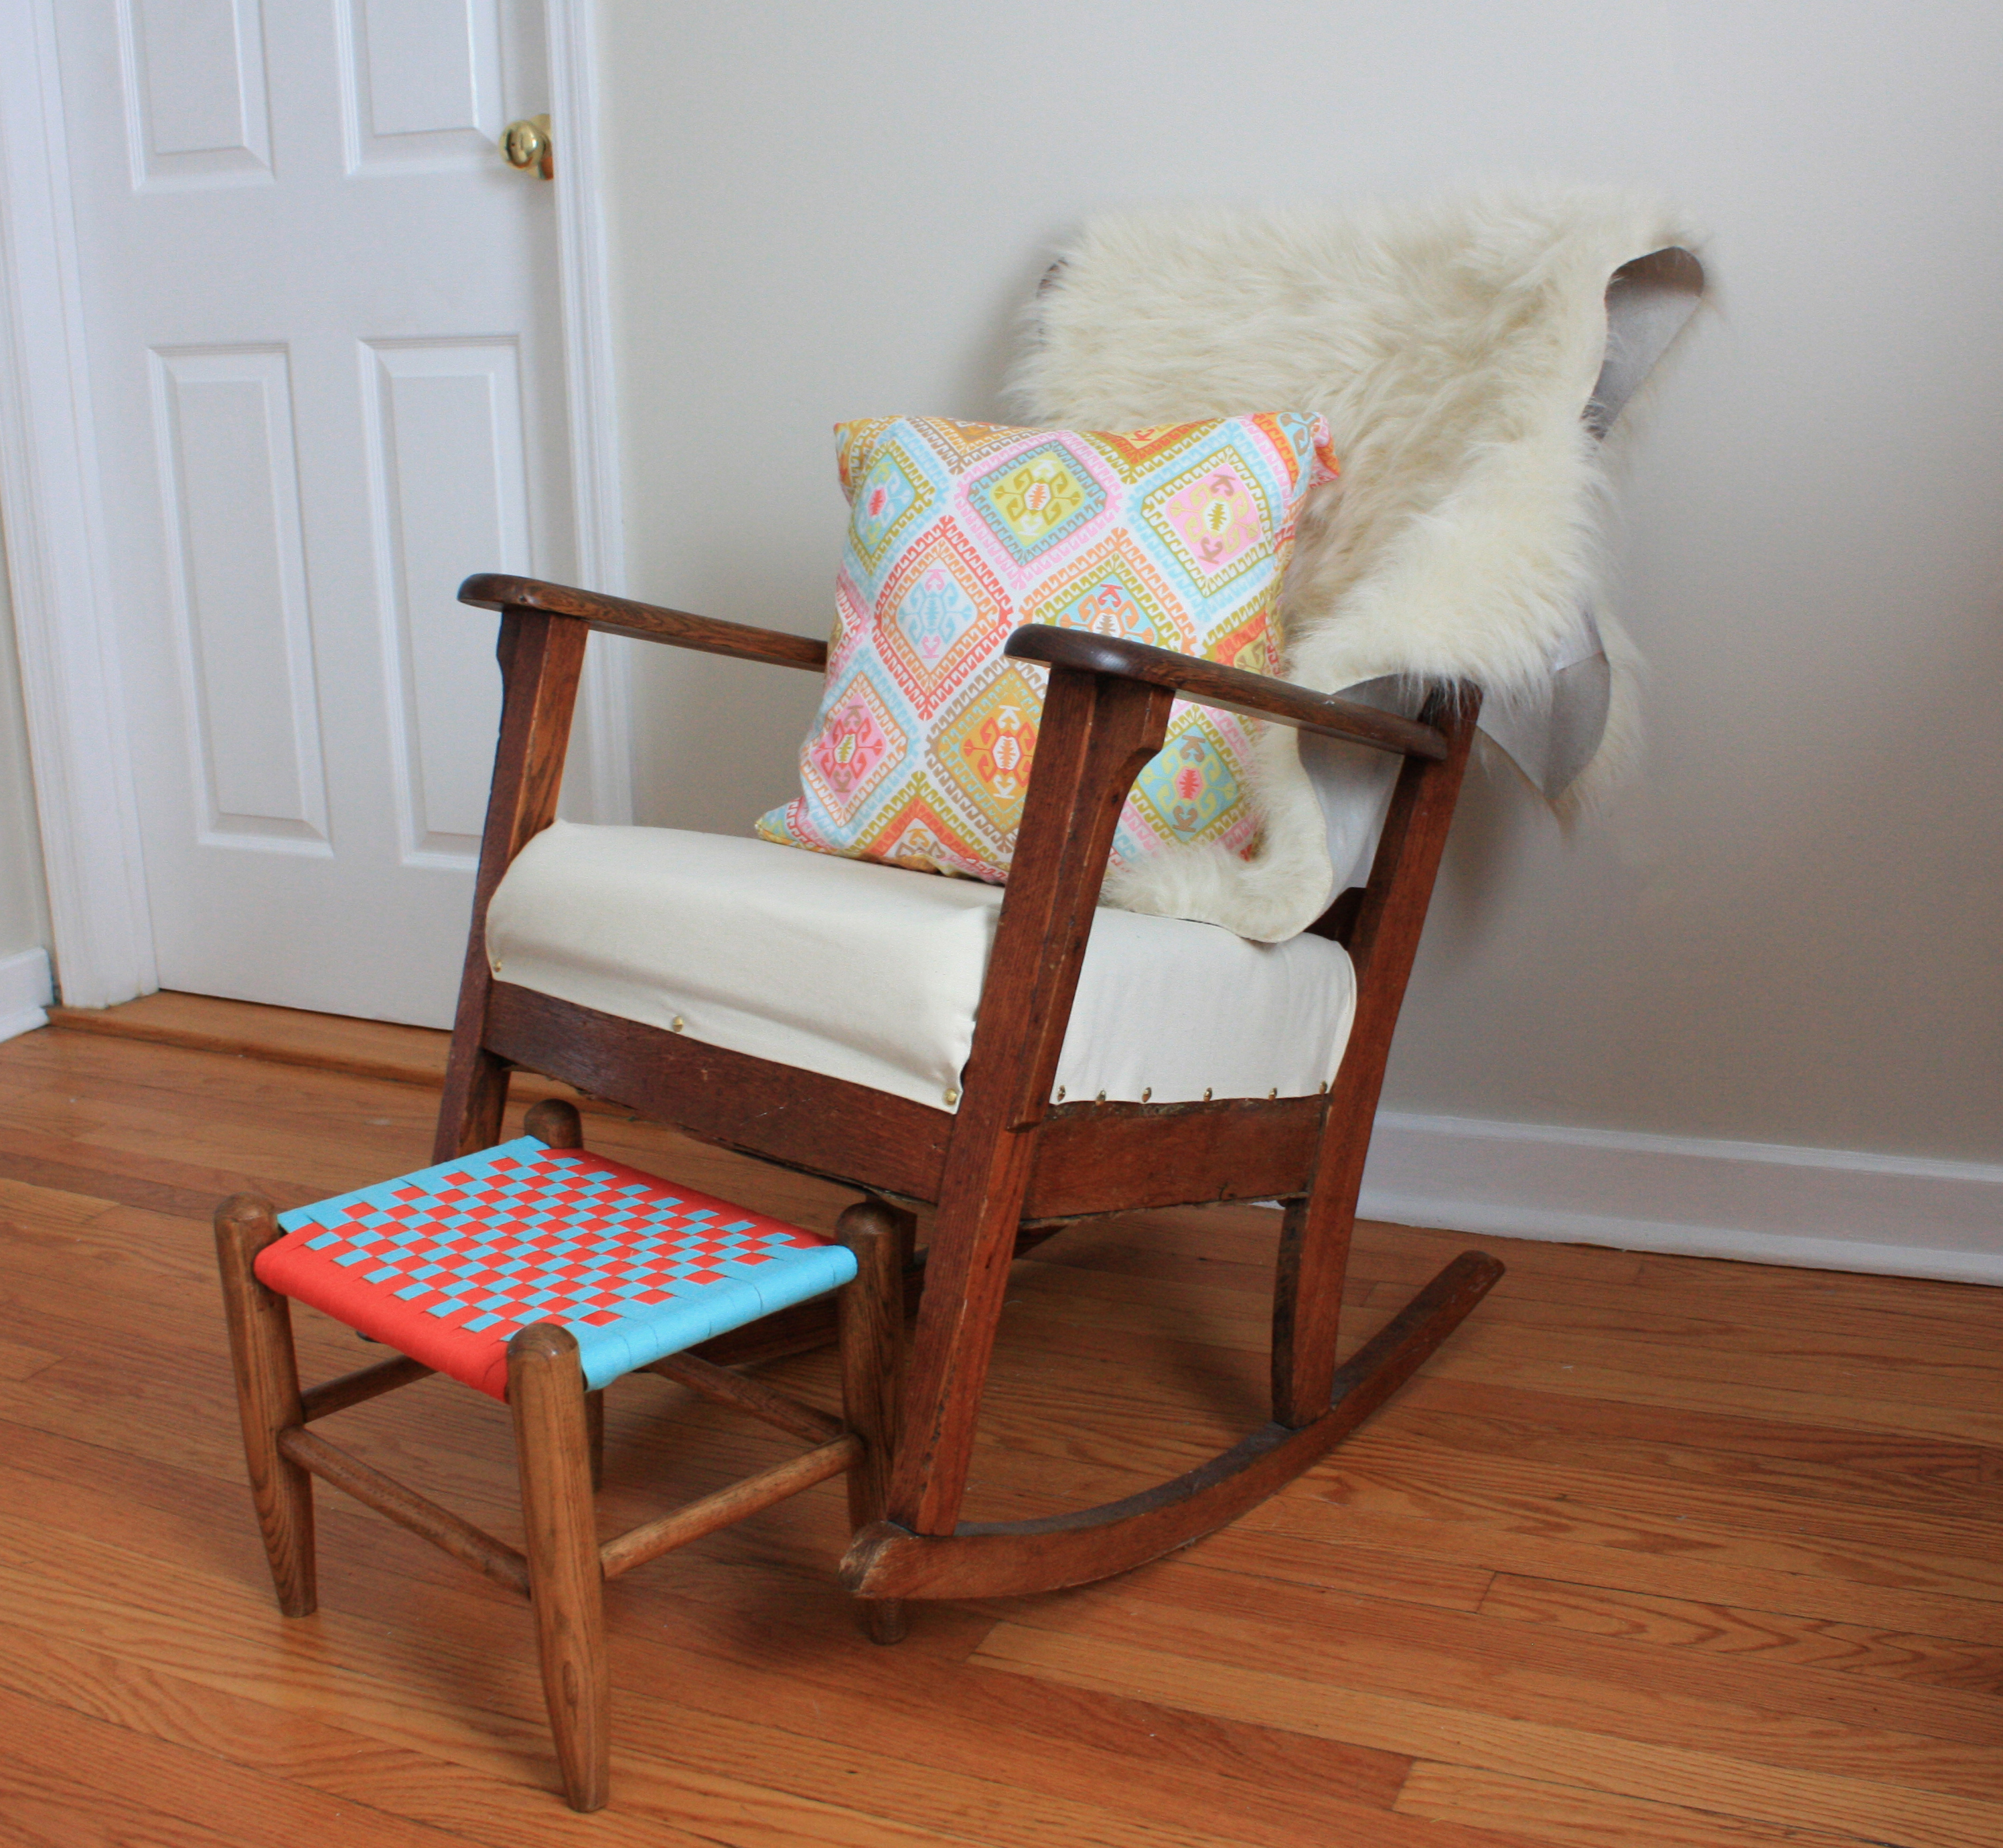
One of the final projects for the baby's nursery was to reupholster my old rocking chair and stool. The rocking chair has been around the block, but it's always been one of my favorite pieces of furniture. My parents had it in their college apartment and I grew up with it in my house (with a denim patchwork seat). Years ago, when I brought it to my Brooklyn apartment, I reupholstered the seat with recycled green leather. Now I'll be using it when I'm nursing the baby I decided I had to up the comfort level a little bit while coordinating with the nursery.

I added a big down pillow covered with Michael Miller Sorbet Spa Geo Coral fabric to lean on when nursing or rocking the baby (I also have a nursing pillow), and draped over the back of the chair a faux-sheep skin rug I got on clearance at Target.  I've always wanted a sheep skin rug, but I always felt gross when I saw the big bin of them at Ikea, so I was psyched to find an animal-free version for $20.

The stool I got for $4 at a yard sale about two years ago. It's been sitting in the basement since then waiting to be cleaned and re-laced. Buying new twill tape was expensive (I bought 22 yards, used about 20), but worth it to get the exact colors I wanted. I sanded the frame and stained it with a teak colored stain/polyurethane.

Friday
Feb172012

Before & After: Built-in Shelving and Window Seat

I spend a lot of time in my office, but for over a year I was working out of a mess (see below).  After much planning and research I came up with a plan to give myself some much needed storage and Mr. Paws a much needed - and deserved - window seat.

These intructions from the This Old House website gave me the inspiration and basic directions. 

I already hady two RAST chests from Ikea, some gorgeous old wood planks left up in my attic, vintage brass handles from Etsy, and fabric for the window seat.  All I needed to buy was a pre-assembled kitchen wall cabinet, two 6 foot 2x4 pieces of lumber, stain and shelf brackets.

Wednesday
Jan042012

DIY: Bathroom Door Paint Job

When we moved into our house the tiny downstairs bathroom was partially unfinished.  Two years later and the downstairs bathroom is still partially unfinished.   However, I felt inspired when I saw Martha Stewart Living

After much contemplation I decided to do a variation of the painted shapes project.  I loved the paint color Rainforest by Martha Stewart, but for my room I thought a slightly more teal color would be better and settled on Mermaid Harbor by Behr.  For the gold accent I used Metallic Gold by Rust-Oleum Painter's Touch.

I struggled with laying out my pattern on the door, it was the most difficult part of the project and I had to do it over two days because I was so frustrated.  If I did this again I would probably just buy a stencil to use for the corners.

Step 1:

Sand and paint your door the base color of your choice.  I chose a satin finish, which is easy to wipe clean when needed, but not as shiny as a semi-gloss or gloss.

Step 2:

After the base coat is dried, use tape (see below for more info) to first lay out your pattern (as seen in red here).  Then, use more tape to border your pattern on both sides (as seen in blue here).   Finally, remove your tape pattern to show paint.

Step 3:

Use a primer to paint your pattern.  After it is dried begin painting the pattern with your accent color.

Step 4:

Remove all the tape and touch up edges with a small sponge brush.

Learn from my mistakes:

  • Japanese paper tape worked best for me when laying out my pattern.  Blue painters tape allowed the paint to bleed.  I didn't try, but have a feeling that FrogTape also would have worked well.
  • After laying out your tape first paint your pattern with primer.  Once the primer dries you can paint with your accent color.
Saturday
Aug202011

DIY: Chevron Frosted Bathroom Window

Our upstairs bathroom gets great light, but it faces the street so it's not really appropriate to leave them uncovered.  We have mini-blinds in the window right now, but I hate having those dust collectors in my clean bathroom.  I saw this tutorial on Seventh House from the Left via Pinterest for using frosting window film to create patterns on the window.

We still have the mini blinds on the top part of the window for now - stay tuned for whatever I end up doing on that half of the window.  I'm thinking some sort of Roman shade.

I created a chevron pattern on a piece of cardboard and used it to trace and cut pieces of frosted film paper from Ikea.  The hardest part was spacing out the zig zags on the window.  This took me hours to figure out - math has never been my strong suit.  I tried measuring out the spaces on my computer, but in the end it was easier to just eyeball it by Scotch taping the cut-outs on the window. 

Once I had the cut-outs in place, I cleaned the glass and applied them to the window one-by-one.  Using rubbing alcohol and a paper towel cleaned the glass perfectly with no streaks.

The new window looked so nice I had to spruce up the mini blinds a little bit by replacing the plastic pulls with a piece of cut glass from an old chandelier. 

Thursday
May202010

DIY: End Table Makeover

Ol' Eagle Eyes (moi) over here found this table on the street over a year ago (note:  I have since stopped this habit after living through the ongoing Brooklyn bed bug epidemic).  At the time I was living in a teensy apartment with zero room for my hobbies, but luckily my very understanding & supportive boyfriend didn't say a peep as I attempted to strip all the gunk, glue & varnish in our kitchen...and leave it there for 9 months.

More photos and details about the project after the jump.

CLICK HERE FOR MORE