Entries in DIY Projects (25)

Tuesday
Aug272013

Baby DIY: Save a Stained Shirt with Ribbon

I recently bought Elliot two new t-shirts from Uniqlo and both were stained pretty much immediately after she wore them. Let's just say that Abe is good at a lot of things, but treating and preventing stains isn't one of them. And that's how the shirts went through the wash and the stains were set in the hot dryer.

I let my daugher wear lots of stained clothing, but these shirts were brand new and I didn't want to give up on them yet. So I pulled out some cute ribbon and zig zagged it down the front of the shirt - strategically zagging over all the stains. Then I sewing down the ribbon and made a little decorative bow.  The result? The shirt is even cuter!


Monday
Aug062012

DIY: Cards and Photos Memory Book

It's impossible for me to throw announcements, postcards, and holiday and birthday cards away.  Unfortunately we're running out of room on the kitchen walls and I needed to do something about storing whatever I wanted to keep.  I saw a couple ideas on Pinterest and yesterday decided to hit Michael's for supplies. The finished product is a clean and simple way to keep cards organized and also make it easy to flip through the collection - kind of like a memory book.

Supplies

  • chip board or matte board for front and back, cut so they're slightly larger than your biggest card
  • (2) hinged binding rings - Michael's only had 2" rings, smaller would be better
  • grommet kit (sold at Home Depot or other hardware stores)
  • hole punch
  • large rubber band (sold with scrapbooking supplies)
  •  

    Instructions

  • Follow instructions on grommet kit and punch holes in chip/matte board and insert grommets (best if you do this on cement, you need to hammer it hard.)
  • Line up your cards on the boards and punch holes in your cards so they line up with the grommets.  
  • Connect everything together with the hinged rings
  • Wrapping with the jumbo elastic will stop the cards from flopping around and slipping out of the sides of the board
  •  

    Wednesday
    Jul112012

    DIY: Cat Nip Pillows

    Whenever we go on vacation I feel so guilty leaving Mr. Paws.  Our cat-loving friends come to the house to check up on him, but the little guy just misses his family and gets very sad (well, in all honestly I think he'd be fine if Lily left and never came back).

    To help get him through the week I made him some super potent cat nip pillows with cat nip from my garden.  Nothing like a little natural mind-eraser to calm separation anxiety.

    Materials:

    • dried cat nip
    • polyester stuffing
    • fabric scraps cut into rectangles or squares
    • thread, scissors, sewing machine/needle, iron

    Step 1:  Fold fabric squares in half, inside out.  Then fold back the open ends 1/2"and press with iron.

    Step 2:  Sew the left and right sides of your square so you have an open pocket. 

    Step 3:  Turn your pocket right-side out.  Stuff the pocket with a mix of polyester stuffing and cat nip - don't be stingy with the nip!

    Step 4: Sew up the open end of your pocket and make your cat beg for this happy treat.

    Tuesday
    Feb212012

    Decisions: Living Room Wall Color

    When we moved into our house each room in the house painted a different color.  It was pretty, too bold and country classic for me.  In the last two years we've slowly painted each room gray, white, taupe and cream.  I know, totally boring, but it maximizes the limited natural light we get in our north-facing house.

    The one room we haven't touched is the living room.  It's painted a pretty marigold yellow - something I would never choose myself, but Abe and I have always loved it.  That is, until recently.  The color is super cozy, but absorbs the light and blends in too much with our honey maple wood floors and trim.  Everything feels so yellow.  But the clincher was the new couch fabric, which ended up being a very light gray (oopsie, always see a sample before you buy!)

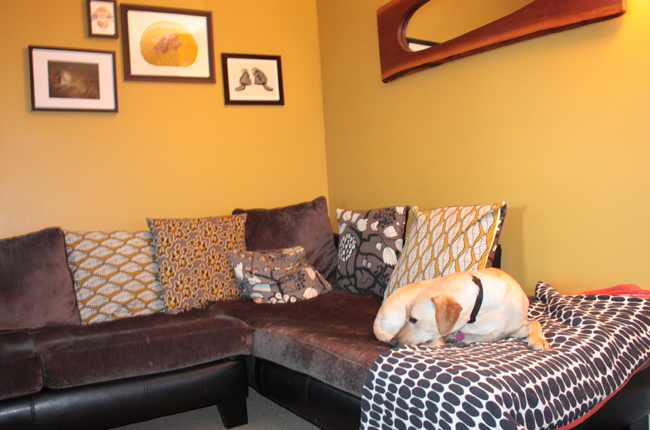
    This photo shows the old couch fabric. It was a great color, but the material was no match for a yellow Lab puppy.

    In conclusion, I've made my case for painting the walls a new color and finally got Abe to agree to a change.  The big question is:  What color? and the follow up to that is:  How do I feel about accent walls?

    In my head I'm picturing maybe a grayish purple or a grayish light green.  Abe is against painting the walls just plain gray, which would be my preference.

    Benjamin Moore has a great website for browsing colors.  These four are my "safe" choices. I'm sure they'll look nice, but I feel like they might make me bored.


    These totally negate my wish for a brighter room, but I feel like it would really make the wood in the room pop while camoflaging the black tv and black frame of the couch. My gut says it might look awesome, but I have a feeling it'll be tough to get Abe to buy in to this choice.

    Wednesday
    Feb152012

    Stuffed Quilt Sewing Project

    This project was time consuming, but super easy and cheap! After hemming the guest room curtains I had 2 yards of nice charcoal gray fabric leftover (Ikea makes their curtains way long), and I also had stuffing from an extra couch cushion. I figured I would combine the two and try making a stuffed quilt. For the back of the quilt I used cute yellow/black/white fabric that I had in my attic stash, and then bought some blanket batting for the middle layer (not totally necessary, but makes the blanket a little smoother so you can't feel the seams).

    Piles of fabric squares

    Making the top of the quilt involved making fifty-six 7" stuffed squares, sewing them into strips of eight and then sewing the strips together into a larger square.  The alignment was a little off, precise measurements has never been my strong suit. 

    Finally, I sewed the three layers (quilt, batting, back) together and trimmed the edges with light gray bias tape.

    Supplies:

    • squares of fabric - 7" is manageable. You need one top and one bottom for every mini pillow.  Use cheap fabric for the bottom layer, no one will see it.  Chopping up an old sheet is a great way to reuse & upcycle!
    • stuffing (you only need a small handful for each mini pillow)
    • fabric for back of your blanket
    • blanket batting
    • bias tape